Apart from the main Administrator account, WordPress supports so-called users with additional privileges. Such users can access the dashboard, but their operations are restricted to specific options.
There are 5 types of WordPress users:
Subscribers - basic account type assigned to all website visitors who signed up on your website. They do not have any special privileges. A logged in subscriber can only edit her/his own profile settings.
Contributors can create new posts and approve comments.
Authors - users who can create new posts, approve comments and upload media files. However, they can’t access the WordPress website settings and edit existing posts of other users.
Editors - these users can edit/create all posts and pages, add/remove media files of any other user.
Administrators - accounts with the highest level of access, they can edit any WordPress content items or settings.
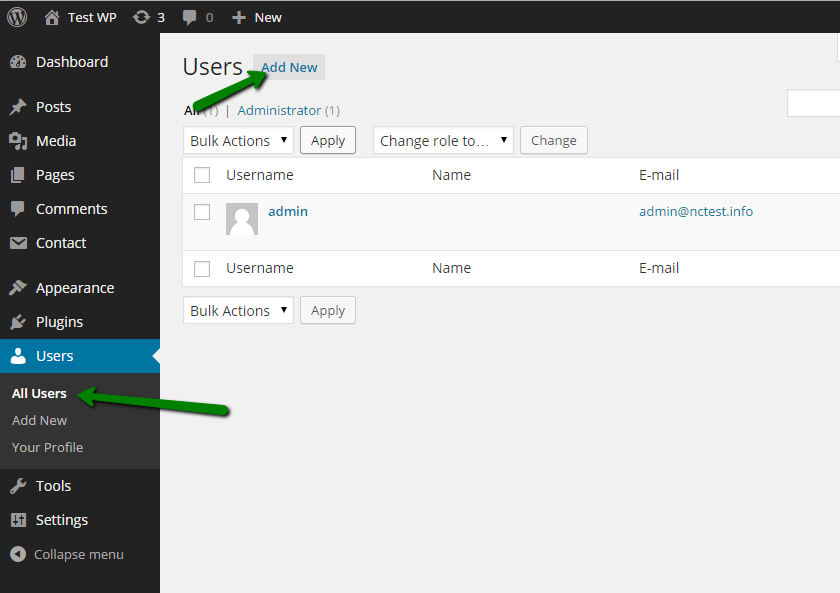
You can change the account type in the WordPress dashboard > Users section. In order to create a new user, click on the Add new option:
On the next page, fill out the following fields: Username, E-mail, Password, First and Last Name (optional), Website for this account and select the desirable role from the drop-down list. Once done, click on Add New User: 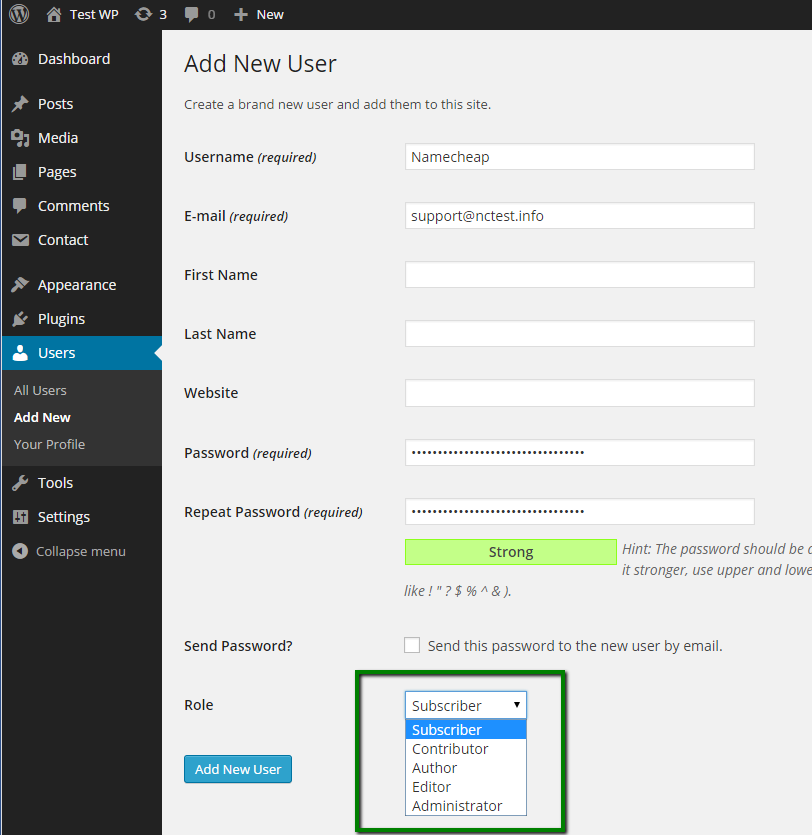
If you wish to change the role of the existing user, go back to the All Users list, check the user in question and set the new role via the Change role to... option: 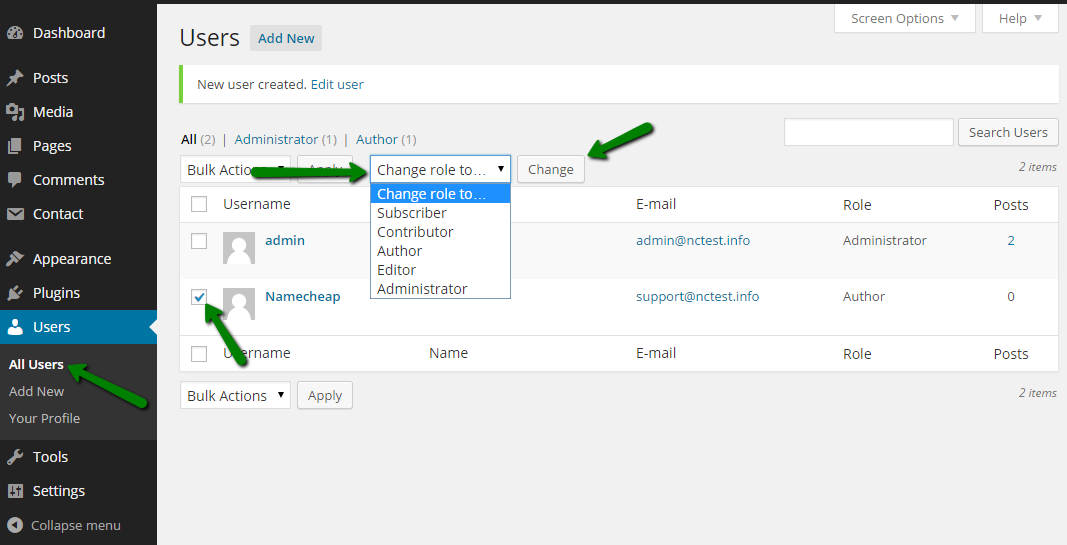
You can also change the user role manually in the database via phpMyAdmin.
It is strongly recommended to back up the database before proceeding.
1. In cPanel go to phpMyAdmin and select your Wordpress database (you can check the database name of your installation in the wp-config.php file, line define ('DB_NAME', 'databasename'); ).
2. Select the wp_users table, locate the account role you want to change and memorize its ID, you will need it later.
In this example, we will change the role of “Ekhteear” account, its ID is 6: 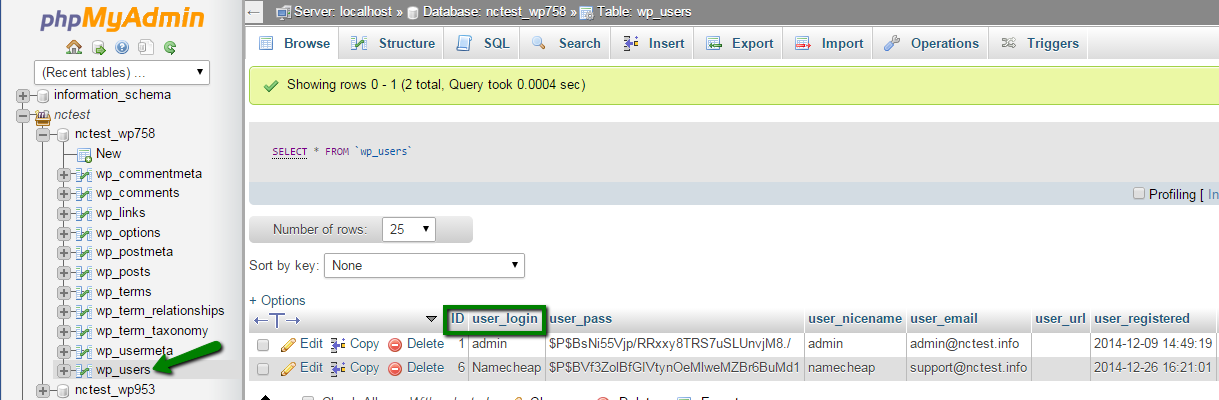
3. Now go to the wp-usermeta table, click on Search.
Input the user ID into the user_id field and wp_capabilities into the meta_key field and click on Go: 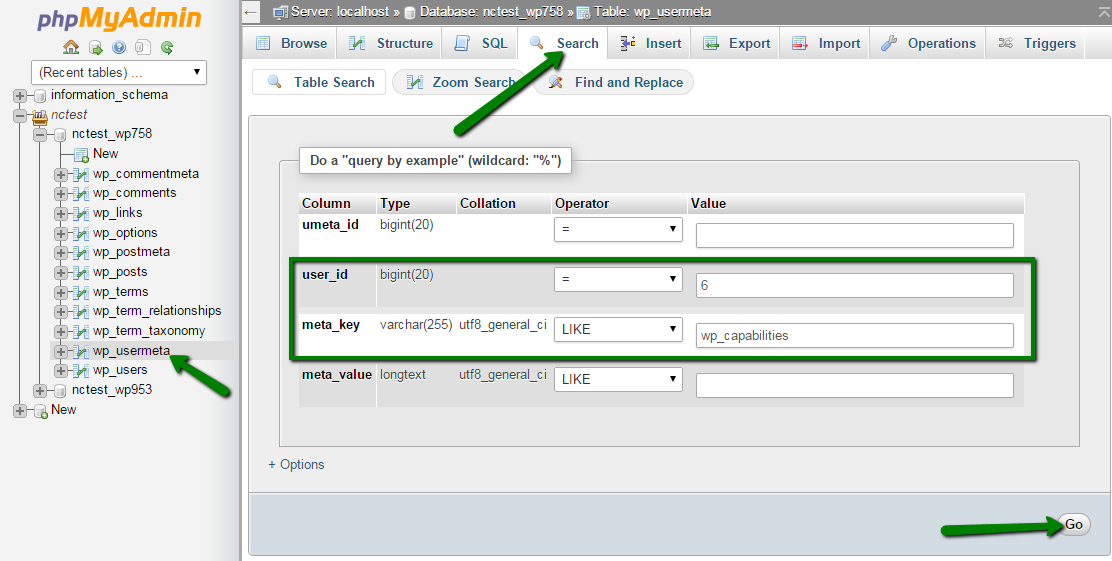
4. You will see a database cell containing a record specifying the current Role of the user. In our example, it is author. In order to change it, click on Edit: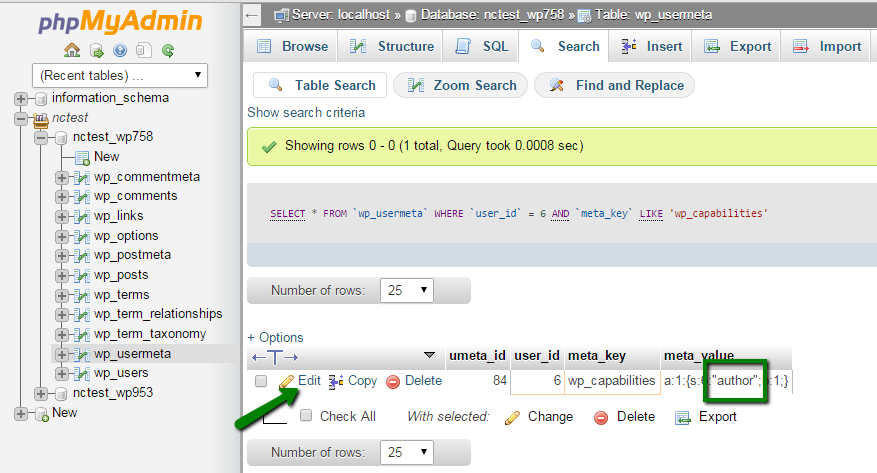
5. On the next page, you will need to replace the current meta_value with the new one according to the role you need:
a:1:{s:10:"subscriber";b:1;} - Subscriber
a:1:{s:11:"contributor";b:1;} - Contributor
a:1:{s:6:"author";b:1;} - Author
a:1:{s:6:"editor";b:1;} - Editor
a:1:{s:13:"administrator";b:1;} - Administrator
In our example we are making a “Ekhteear” user an administrator by inserting the corresponding code into her/his wp-usermeta database cell: 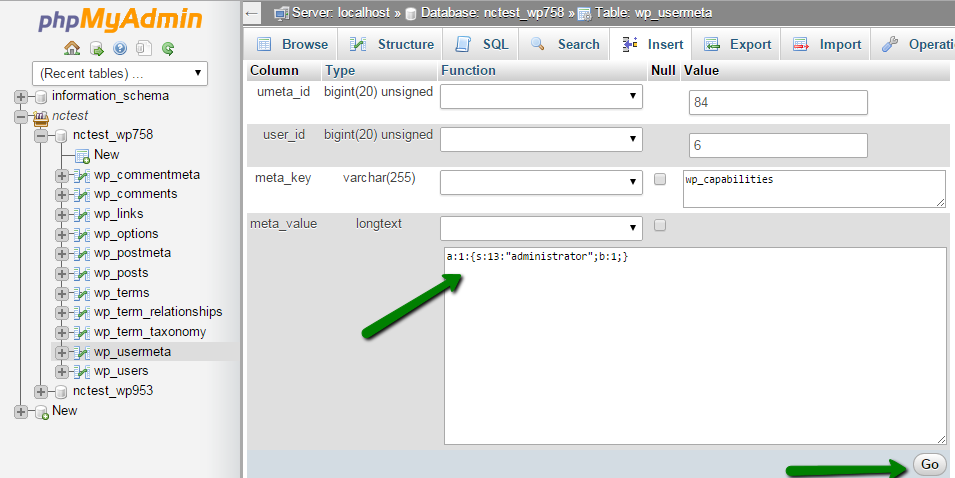
That's it!
Need any help? Contact our HelpDesk
